Oh pizza. PIZZA. You're such a temptress, pizza.
I've been through them all - the crazy chemical miracles that are on the market to help those of us aspiring to be vegan to calm our cravings. But there's the aftertastes - the freaky textures - the plastic-coated tongue - nothing does it for me. The only thing that takes a little of the edge off? Cashew cheese.
I know I've harped on the stuff before, many a time, but you guys should know - my love doth not lessen. CC hits all the importants - crisps under the broiler, has the all important indulgent, fatty flavor and texture, and it's extremely customizable. Making a tex-mex pie? Stick half a jalapeno, a handful of cilantro, and use lime juice rather than lemon for tang whislt pureeing the nuts.
The above pie? Buffalo mushroom with carrots, celery, roasted tomato, topped with jalapeno/parsley puree. HOT POTATO and extremely delish. Details below.
Buffalo Mushroom Pizza
serves 2
For pie:
1 batch pizza dough (gluten-free crusts work wonderfully here my dears - here's one to try)
6 ounces sliced Crimini mushrooms tossed with 4 tablespoons Frank's Red Hot sauce
4 small Roma tomatoes, sliced
1 large carrot, peeled, diced
2 medium ribs celery, chopped
1 cup freshly made Cashew Cheese, extra-garlicy
For puree:
3 tablespoons freshly minced parsley
2 scallions, minced
1 small jalapeno, stemmed, unseeded (I like the spicy.)
1/2 tsp sea salt
Just enough water to process
Gotta make that delish cheese first. Here's how:
Soak 2/3 cup raw cashews in hot water, just enough to cover, for 20 minutes. Drain half the water off and toss them into the blender, along with the juice of one lemon, 2 tablespoons nutritional yeast, 1 teaspoon salt, 3 cloves garlic (minced) and pulse until the cashews start to break down. You'll most likely need to get a scraper out to help the puree process along. Chunky texture is good - but not too chunky. If your cheese ends up a little wet - transfer to a small baking sheet and bake in a 350f oven for 10-15, scraping often, until it dries out a bit.
Meanwhile, roast your tomatoes and mushrooms: toss the sliced Romas with a little olive oil, lay out on a baking sheet, and throw them in a 400f oven for 20 minutes or so. Just enough to char them a tiny bit, and dry them out. Same with the mushrooms - you want them to release a little liquid and absorb your hot sauce. Remove veggies and turn the heat to 450f.
Roll or throw your pizza dough into a 12-14 inch round. Brush it with olive oil.
Spread a good heaping tablespoon of cheese over the dough, spreading with a spoon or your fingers. This is the glue layer - it'll help keep your toppings on your pizza. Lay the tomatoes over the pie, attempting not to overlap. Then scatter carrots and celery. Then mushrooms. Now, with your fingers, grab half-handfuls of cashew cheese and gently "throw" it at your pizza, covering the pie as evenly as possible. I love this technique as it allows the cheese to make peaks that brown very nicely as the pie bakes.
Toss that sucker in your preheated oven and bake 10-12, until crust is golden brown and the cashew cheese is starting to toast.
While the pie is baking, rinse your blender out and make the jalapeno puree - add all ingredients to your blender and whirr until combined, adding just enough water to make things go smoothly.
Remove pizza from oven. Transfer puree to a squirt bottle. Drizzle pizza with puree, slice, and serve.
Enjoy, my dears!
Showing posts with label pizza. Show all posts
Saturday, February 18, 2012
Friday, April 8, 2011
Vegan Quickie
I gotta do it - I gotta brag.
I feel like the better you are at cooking, the more you really get to know process, flavor, and nutrition, the harder it is to make something that you think is really over-the-top badass. I mean, I remember, waaaay back, stealing my first few recipes off of Epicurious, successfully making them, and giving myself biiig props. I got all excited. I bought a copyright '63 printing of MtAoFC and felt cool. It's been a long and rad journey since then, and I've become much much much more of a snob.
So when I tried a different idea on cashew cheese a couple days back for a gluten-free, vegan potluck - a cleanse group run by a pal - I wasn't all that excited, I'd done this before, kind of a sad, me too me too recipe (but decent in stuffed shells) thinks I. Well, let me tell you. I put too much lemon in this time. Added a ton of roasted garlic and doubled the nutritional yeast. Forgot it was sitting on the back of the stove, so it fermented a full 18 hours. Baked it to dry it out a bit at the end and GOOD GOD was this cheese sick, stinky, tart, salty, round in flavor, all the things I'd always wanted cashew cheese to be, but had never witnessed.
Put it on a couple of pizzas. And they were really, really good. And I'm not just saying that.
Gives me hope that one day, one dayyyy, I'll be able to transition away from my biggest addiction (sans smoking, that is...): cheese.
Once I figure out exactly what I finally did right this time, I'll share. 'Till then, pizza porn for you. Oh and happy Friday!
I feel like the better you are at cooking, the more you really get to know process, flavor, and nutrition, the harder it is to make something that you think is really over-the-top badass. I mean, I remember, waaaay back, stealing my first few recipes off of Epicurious, successfully making them, and giving myself biiig props. I got all excited. I bought a copyright '63 printing of MtAoFC and felt cool. It's been a long and rad journey since then, and I've become much much much more of a snob.
So when I tried a different idea on cashew cheese a couple days back for a gluten-free, vegan potluck - a cleanse group run by a pal - I wasn't all that excited, I'd done this before, kind of a sad, me too me too recipe (but decent in stuffed shells) thinks I. Well, let me tell you. I put too much lemon in this time. Added a ton of roasted garlic and doubled the nutritional yeast. Forgot it was sitting on the back of the stove, so it fermented a full 18 hours. Baked it to dry it out a bit at the end and GOOD GOD was this cheese sick, stinky, tart, salty, round in flavor, all the things I'd always wanted cashew cheese to be, but had never witnessed.
Put it on a couple of pizzas. And they were really, really good. And I'm not just saying that.
Gives me hope that one day, one dayyyy, I'll be able to transition away from my biggest addiction (sans smoking, that is...): cheese.
Once I figure out exactly what I finally did right this time, I'll share. 'Till then, pizza porn for you. Oh and happy Friday!
Wednesday, January 26, 2011
Pizza Eggs and Red Sauce
I make at least one batch of tomato sauce each week - I'm like a little red sauce machine.
I keep it simple and affordable, especially during the winter when fresh tomatoes are a joke - but have been known to peel and seed 10 pounds of 'maters in the summer for the same recipe (and as you can imagine, it's super delish, but time consuming).
I digress.
So, red sauce obviously has a place in a gazillion dishes - lasagna, pizza, pasta and (lentil, soy, reg) meatballs, stuffed shells...
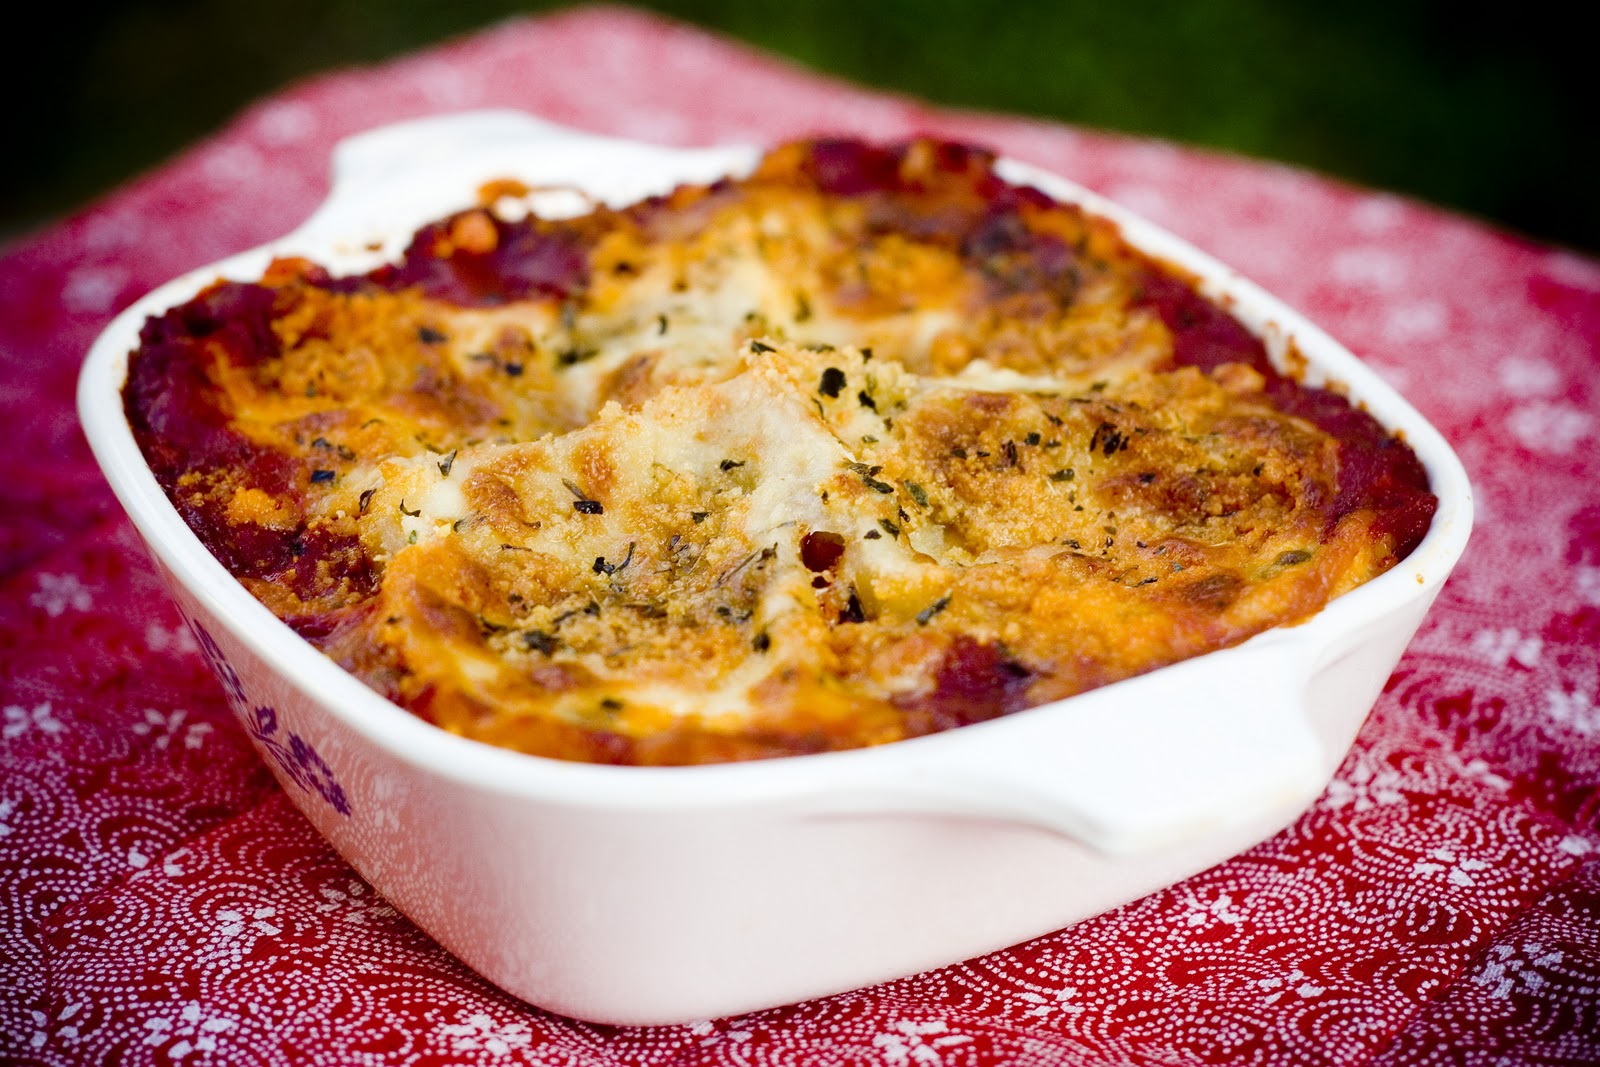
I love making those little stuffed pockets of amazingness. I only do the one layer of sauce, a lot of it at casserole bottom, and float the shells atop it, all covered in cheese, islands of gooey, cheesy awesome. But the thing I'm eating most often with ze Red Sauce lately is pizza eggs. Because breadcrumbs + eggs are a really neat textural trick, and I can't get enough.
So for the Sauce, here we go: (makes 3.5-4 cups)
2 large cans crushed tomatoes
1 small can tomato paste
1 small red onion, diced
1/2 handful fresh or frozen basil leaves, chopped
1 tsp dried Oregano
1/2 cup bitey red wine
10 garlic cloves, crushed and minced
1.5 tsp sugar
1.5 tablespoons sea salt (varies based on what brand of tomato you're using - I use only the no-added-salt variety
2 tablespoons olive oil
Heat the olive oil over medium heat and saute onion and garlic 4 minutes, until onion is translucent. Add wine and boil a bit, to release alcohol - then add remaining ingredients MINUS tomato paste, stir, cover and simmer 40-50 minutes, until tomatoes have liquified, or are close. Stir often.
I keep the paste out of the pot until the end because it thickens the sauce enough to make it cook more slowly - the wetter the liquid around your crushed maters, the quicker they'll turn to mush, which is what we want.
Add your paste and thoroughly mix. Taste for sweet/salt and adjust as needed. For pizza and pizza eggs, you want a thick sauce, but for pasta and lasagna, slightly thinner - so don't be afraid to add a teeny bit of water if you're making the latter.
The eggs are fairly easy - you'll need:
1/2 cup red sauce
1/4 cup breadcrumbs, mixed with 1 tsp garlic powder, 1/2 tsp salt and 1 tsp crushed red pepper
1/2 cup freshly grated mozz
1 tablespoon parmesan cheese
1/2-1 tablespoon butter, depending on how well-seasoned your skillet is
2 eggs
In a cast-iron skillet, melt your butter over medium-high heat. Turn your broiler on High.
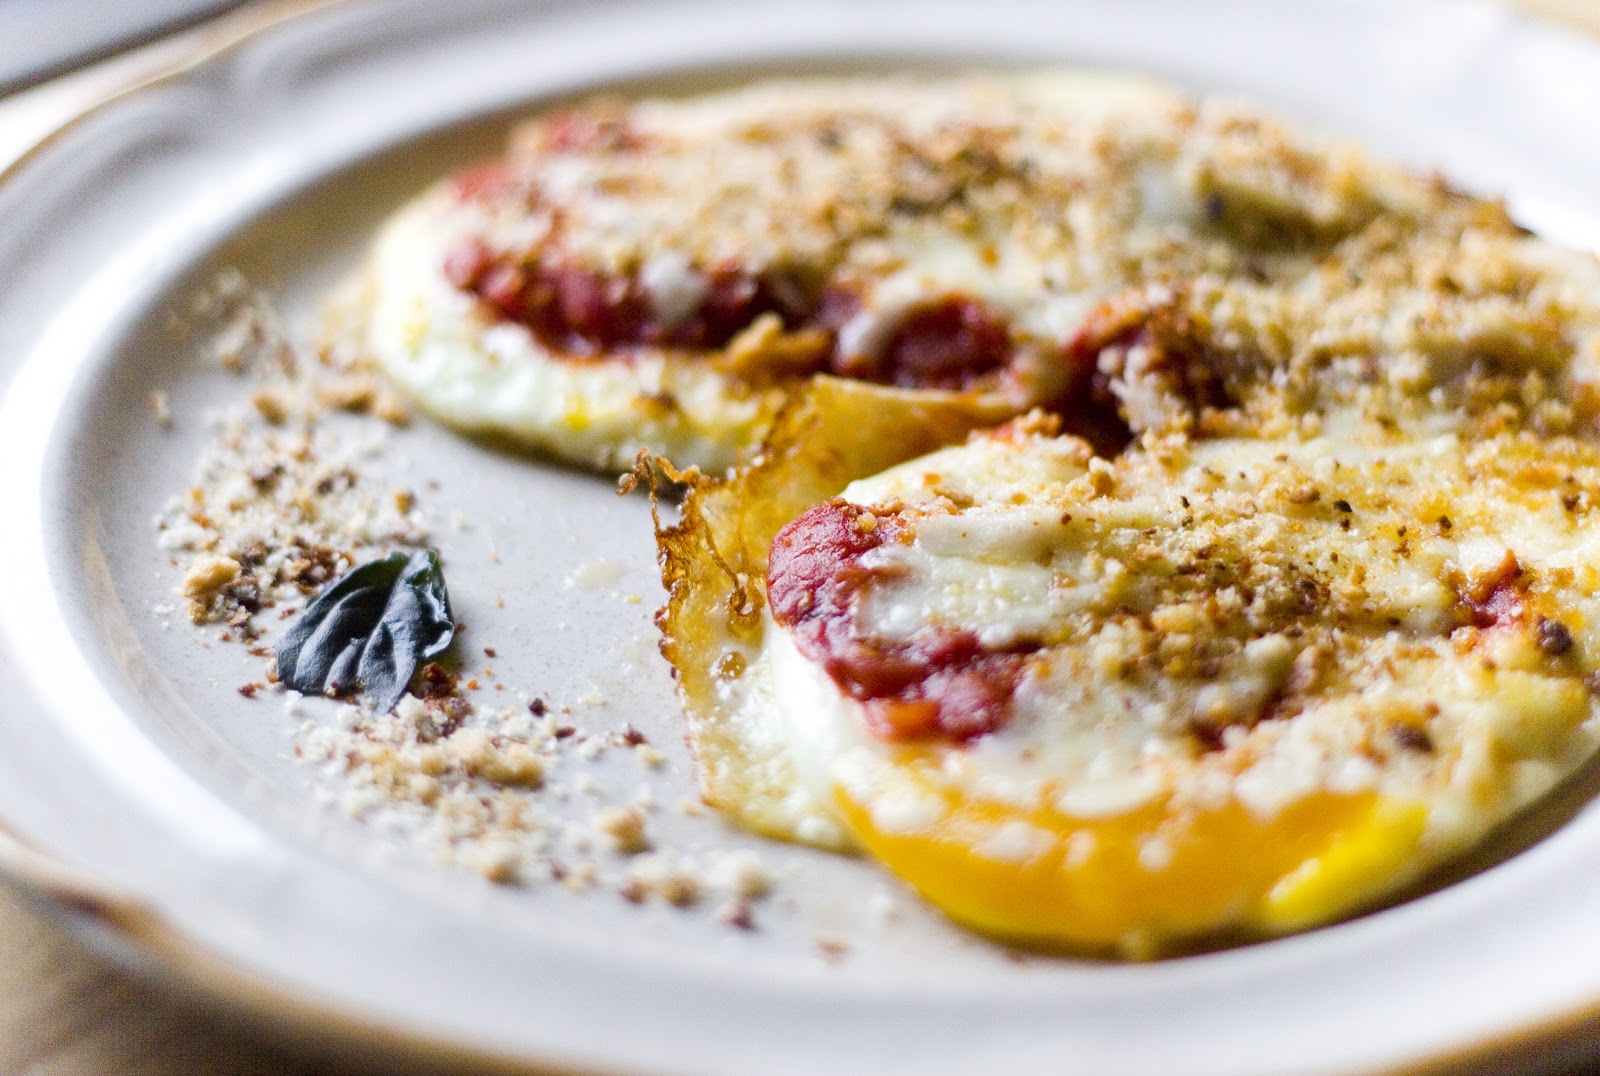
Crack the eggs into the skillet, letting them collect into palm-sized pools (I do this by tipping the skillet ever so slightly, the wall helps). After the bottoms have turned to white, break the yolks, once, with the edge of your spatula. Spoon sauce over the middles of the eggs, spreading gently, and cover with mozz and parm, leaving a small edge of egg between the sauce, cheese, and pan, so you don't get spill over. Quickly dust with breadcrumbs and stick the skillet under the broiler for 45-60 seconds, until the mozz has melted a bit and just started to brown.
Carefully slide them onto a plate and serve with more garlic powder and red pepper, as needed. Hella awesome breakfast and super quick! If you kept the yolks runny enough, these babies would be heavenly over pasta, methinks.
I keep it simple and affordable, especially during the winter when fresh tomatoes are a joke - but have been known to peel and seed 10 pounds of 'maters in the summer for the same recipe (and as you can imagine, it's super delish, but time consuming).
I digress.
So, red sauce obviously has a place in a gazillion dishes - lasagna, pizza, pasta and (lentil, soy, reg) meatballs, stuffed shells...
I love making those little stuffed pockets of amazingness. I only do the one layer of sauce, a lot of it at casserole bottom, and float the shells atop it, all covered in cheese, islands of gooey, cheesy awesome. But the thing I'm eating most often with ze Red Sauce lately is pizza eggs. Because breadcrumbs + eggs are a really neat textural trick, and I can't get enough.
So for the Sauce, here we go: (makes 3.5-4 cups)
2 large cans crushed tomatoes
1 small can tomato paste
1 small red onion, diced
1/2 handful fresh or frozen basil leaves, chopped
1 tsp dried Oregano
1/2 cup bitey red wine
10 garlic cloves, crushed and minced
1.5 tsp sugar
1.5 tablespoons sea salt (varies based on what brand of tomato you're using - I use only the no-added-salt variety
2 tablespoons olive oil
Heat the olive oil over medium heat and saute onion and garlic 4 minutes, until onion is translucent. Add wine and boil a bit, to release alcohol - then add remaining ingredients MINUS tomato paste, stir, cover and simmer 40-50 minutes, until tomatoes have liquified, or are close. Stir often.
I keep the paste out of the pot until the end because it thickens the sauce enough to make it cook more slowly - the wetter the liquid around your crushed maters, the quicker they'll turn to mush, which is what we want.
Add your paste and thoroughly mix. Taste for sweet/salt and adjust as needed. For pizza and pizza eggs, you want a thick sauce, but for pasta and lasagna, slightly thinner - so don't be afraid to add a teeny bit of water if you're making the latter.
The eggs are fairly easy - you'll need:
1/2 cup red sauce
1/4 cup breadcrumbs, mixed with 1 tsp garlic powder, 1/2 tsp salt and 1 tsp crushed red pepper
1/2 cup freshly grated mozz
1 tablespoon parmesan cheese
1/2-1 tablespoon butter, depending on how well-seasoned your skillet is
2 eggs
In a cast-iron skillet, melt your butter over medium-high heat. Turn your broiler on High.
Crack the eggs into the skillet, letting them collect into palm-sized pools (I do this by tipping the skillet ever so slightly, the wall helps). After the bottoms have turned to white, break the yolks, once, with the edge of your spatula. Spoon sauce over the middles of the eggs, spreading gently, and cover with mozz and parm, leaving a small edge of egg between the sauce, cheese, and pan, so you don't get spill over. Quickly dust with breadcrumbs and stick the skillet under the broiler for 45-60 seconds, until the mozz has melted a bit and just started to brown.
Carefully slide them onto a plate and serve with more garlic powder and red pepper, as needed. Hella awesome breakfast and super quick! If you kept the yolks runny enough, these babies would be heavenly over pasta, methinks.
Thursday, December 2, 2010
Leftovers Pizza, or what we did with the rest of the GBC.
Don't get me wrong - the Moussaka was delish (and RICH), but nerdy me had to do something weird with the last couple of servings.
Nova's Bakery, which is right around the block from us, does some really awesome frozen pizza dough. The stuff is super-light and stretches to such lengths it's crazy. As you knead it, it fills with air - bubbles just naturally form. Awesome. So I made some crusts (yep, two, since we ALSO had leftover Green Bean Casserole), dusting the pans with cornmeal first, and went to it. Because adding cheese to these super-butterfatty foods was the best idea evarrrr!
Doesn't it look like it wants to eat your face? Good god.
And then there was the GBC pie:
Which had to get dusted with just a FEW more fried onions. Nom.
Silly, unhealthy, yeah. But fun!
Monster Moussaka Pizza, from above:
Yeah, I totally ate that missing slice.
Nova's Bakery, which is right around the block from us, does some really awesome frozen pizza dough. The stuff is super-light and stretches to such lengths it's crazy. As you knead it, it fills with air - bubbles just naturally form. Awesome. So I made some crusts (yep, two, since we ALSO had leftover Green Bean Casserole), dusting the pans with cornmeal first, and went to it. Because adding cheese to these super-butterfatty foods was the best idea evarrrr!
Doesn't it look like it wants to eat your face? Good god.
And then there was the GBC pie:
Which had to get dusted with just a FEW more fried onions. Nom.
Silly, unhealthy, yeah. But fun!
Monster Moussaka Pizza, from above:
Yeah, I totally ate that missing slice.
Sunday, September 12, 2010
Caprese Breakfast Pizza
A good way to scarf the last of the Glorious Summer Tomatoes. And simple to boot. Despite being a tad hungover this morning, I had this puppy finished in about 40 minutes.
(Sometimes I feel like such a cheat using the huge aperture trick all the time, do forgive)
4 roma or medium tomatoes, ripe
5 leaves fresh basil
1 pound freshly graded mozzarella
1/2 cup freshly grated parmesan
4 cloves garlic
2 tablespoons olive oil
1/2 tablespoon salt
Fresh black pepper, ground
1 fist sized ball of pizza dough, either made from this recipe, or storebought (nova's! P+P's!), at room temperature
Small pinch cornmeal
5-6 eggs
I used mushrooms in ours, since we had a ton that needed using. Saute them in a little olive oil and salt for 4 minutes, until they sweat.
Roughly dice your tomatoes and toss them with the salt, pepper, and garlic in a heatproof bowl. Set the bowl on a warm surface (or, like me, in the middle of your recently sauteed mushrooms) and let them release their liquid for about 10 minutes.
Preheat your oven to 500f. Toss your cornmeal over your pizza stone or pan. Shape your crust and place on the pan. Squeezing them thoroughly, scatter your tomatoes over the crust. Mushrooms, squeeze gently and do the same. Scatter mozz and half the parm over the tomatoes and mushrooms. Using your fingers or a large spoon, make little indentations where you want your eggs to go. Crack eggs into each indentation and scatter the remaining parmesan over the top of it all.
Bake in upper part of your oven for about 15 minutes, until crust edges and cheese are starting to brown. The eggs will be runny - you can adjust their firmness by broiling them a minute or two, right at the end.
Chiffonade your basil and toss over the top. If you've let yours flower a bit, eat them too! Let cool 5 minutes, slice and serve.
(Sometimes I feel like such a cheat using the huge aperture trick all the time, do forgive)
4 roma or medium tomatoes, ripe
5 leaves fresh basil
1 pound freshly graded mozzarella
1/2 cup freshly grated parmesan
4 cloves garlic
2 tablespoons olive oil
1/2 tablespoon salt
Fresh black pepper, ground
1 fist sized ball of pizza dough, either made from this recipe, or storebought (nova's! P+P's!), at room temperature
Small pinch cornmeal
5-6 eggs
I used mushrooms in ours, since we had a ton that needed using. Saute them in a little olive oil and salt for 4 minutes, until they sweat.
Roughly dice your tomatoes and toss them with the salt, pepper, and garlic in a heatproof bowl. Set the bowl on a warm surface (or, like me, in the middle of your recently sauteed mushrooms) and let them release their liquid for about 10 minutes.
Preheat your oven to 500f. Toss your cornmeal over your pizza stone or pan. Shape your crust and place on the pan. Squeezing them thoroughly, scatter your tomatoes over the crust. Mushrooms, squeeze gently and do the same. Scatter mozz and half the parm over the tomatoes and mushrooms. Using your fingers or a large spoon, make little indentations where you want your eggs to go. Crack eggs into each indentation and scatter the remaining parmesan over the top of it all.
Bake in upper part of your oven for about 15 minutes, until crust edges and cheese are starting to brown. The eggs will be runny - you can adjust their firmness by broiling them a minute or two, right at the end.
Chiffonade your basil and toss over the top. If you've let yours flower a bit, eat them too! Let cool 5 minutes, slice and serve.
Monday, September 6, 2010
Peachzza, two ways.
It struck me while blanching peaches for some homemade poptarts the other day - texturally, there's some shared qualities between a perfectly ripe tomato and ready to eat peach. Both acidic, fleshy, moist. Both seriously gorgeous. And both, lucky me!, readily available (although, as I'm sure my fellow NCers can attest to, my tomato crop has been pretty lame this year). Since I had a bag of frozen pizza dough hanging in my fridge, courtesy of Nova's (seriously, I like theirs more than P+P's even), it was most surely time to stick some peaches on a pie. Did we go with mozz? Nope, fontina and a scattering of smoked gouda. Was it awesome?
Yeah.
The "two ways" - one, sliced peaches instead of sauce. Two, sauce made by blanching and peeling, then reducing peaches with olive oil in a saucepan for a more saucelike effect. Verdict - equally delish - the sauced version far subtler in peachy taste.
Peachzza, way 1:
10 inch pizza crust, or a half recipe of this dough
Small handful cornmeal
1/2 pound fontina, shredded
1/4 pound smoked gouda, grated
1 large onion, sliced thin
2 tablespoons olive oil
Chives, minced
Salt
Pepper
Heat your oil over medium heat in a medium pot, add your onion, cover. Brown them gently, until each ring has a smattering of brown. Keep going until you have deeply caramelized areas throughout your onions, about 30 minutes.
Slice your peaches in half and remove the pit. Slice them thinly, about 1/8 inch thick, and lay them out on your cutting board. Salt them gently, and sprinkle with fresh grated pepper. Set aside.
Preheat your oven to 475f.
Using the technique described here, shape your crust. Scatter some cornmeal across your stone or pizza pan. Scatter your onions across the crust, and cover with concentric rings of sliced peaches. Scatter your fontina first, then your gouda, over the crust.
Bake on the center rack of your oven for 15 minutes, or until crust has browned on the bottom and your cheese is melted, but beginning to brown around the edges. Sprinkle with your fresh chives, let sit 5 minutes, slice and serve.
Way Two: Peach Sauce for Peachzza.
4 medium or 3 large peaches, scored with an X on the bottom
3 cloves garlic, minced
4 tablespoons olive oil
Salt and pepper to taste
1 tablespoon brown sugar
Bring a pot of water to boil and fill a bowl with ice and water in your sink. Plunge your peaches, one at a time, into the boiling water - 20 seconds for smaller peaches, 30 seconds if they're larger, then into the bowl of icewater. Peel them. Cut in half, remove the pit, then chop (carefully! They're slimy).
In a saucepot or dutch oven, heat your olive oil over medium heat. Add your garlic, saute a bit. Toss your peaches in and stir well. Add a splash of water (or sherry, mwahaha). Add your sugar, salt and pepper. Lower heat to medium-low and simmer, covered. The tricky part is that peaches are higher in sugar content that tomatoes - they're going to stick more readily while you attempt to reduce them to sauce. The key is to stir frequently and add handfuls of hot water as needed until you have a thick, orange sauce.
Yeah.
The "two ways" - one, sliced peaches instead of sauce. Two, sauce made by blanching and peeling, then reducing peaches with olive oil in a saucepan for a more saucelike effect. Verdict - equally delish - the sauced version far subtler in peachy taste.
Peachzza, way 1:
10 inch pizza crust, or a half recipe of this dough
Small handful cornmeal
1/2 pound fontina, shredded
1/4 pound smoked gouda, grated
1 large onion, sliced thin
2 tablespoons olive oil
Chives, minced
Salt
Pepper
Heat your oil over medium heat in a medium pot, add your onion, cover. Brown them gently, until each ring has a smattering of brown. Keep going until you have deeply caramelized areas throughout your onions, about 30 minutes.
Slice your peaches in half and remove the pit. Slice them thinly, about 1/8 inch thick, and lay them out on your cutting board. Salt them gently, and sprinkle with fresh grated pepper. Set aside.
Preheat your oven to 475f.
Using the technique described here, shape your crust. Scatter some cornmeal across your stone or pizza pan. Scatter your onions across the crust, and cover with concentric rings of sliced peaches. Scatter your fontina first, then your gouda, over the crust.
Bake on the center rack of your oven for 15 minutes, or until crust has browned on the bottom and your cheese is melted, but beginning to brown around the edges. Sprinkle with your fresh chives, let sit 5 minutes, slice and serve.
Way Two: Peach Sauce for Peachzza.
4 medium or 3 large peaches, scored with an X on the bottom
3 cloves garlic, minced
4 tablespoons olive oil
Salt and pepper to taste
1 tablespoon brown sugar
Bring a pot of water to boil and fill a bowl with ice and water in your sink. Plunge your peaches, one at a time, into the boiling water - 20 seconds for smaller peaches, 30 seconds if they're larger, then into the bowl of icewater. Peel them. Cut in half, remove the pit, then chop (carefully! They're slimy).
In a saucepot or dutch oven, heat your olive oil over medium heat. Add your garlic, saute a bit. Toss your peaches in and stir well. Add a splash of water (or sherry, mwahaha). Add your sugar, salt and pepper. Lower heat to medium-low and simmer, covered. The tricky part is that peaches are higher in sugar content that tomatoes - they're going to stick more readily while you attempt to reduce them to sauce. The key is to stir frequently and add handfuls of hot water as needed until you have a thick, orange sauce.
Monday, July 26, 2010
Leftover pizza can be even better.
I have equal affection for the dried out, reheated, next day slice and the piping hot, greasy, just-outta-the-oven slice. If I'm buying two for lunch, I'll usually take a reheated slice over waiting for the freshly made pie, but I can never tell if this is preference or hunger/lack of patience.
Anyway.
When I'm at home and eating a day-or-two old pizza piece, I have a little ritual I go through, if there's salad makings in the fridge too. Goes like this.
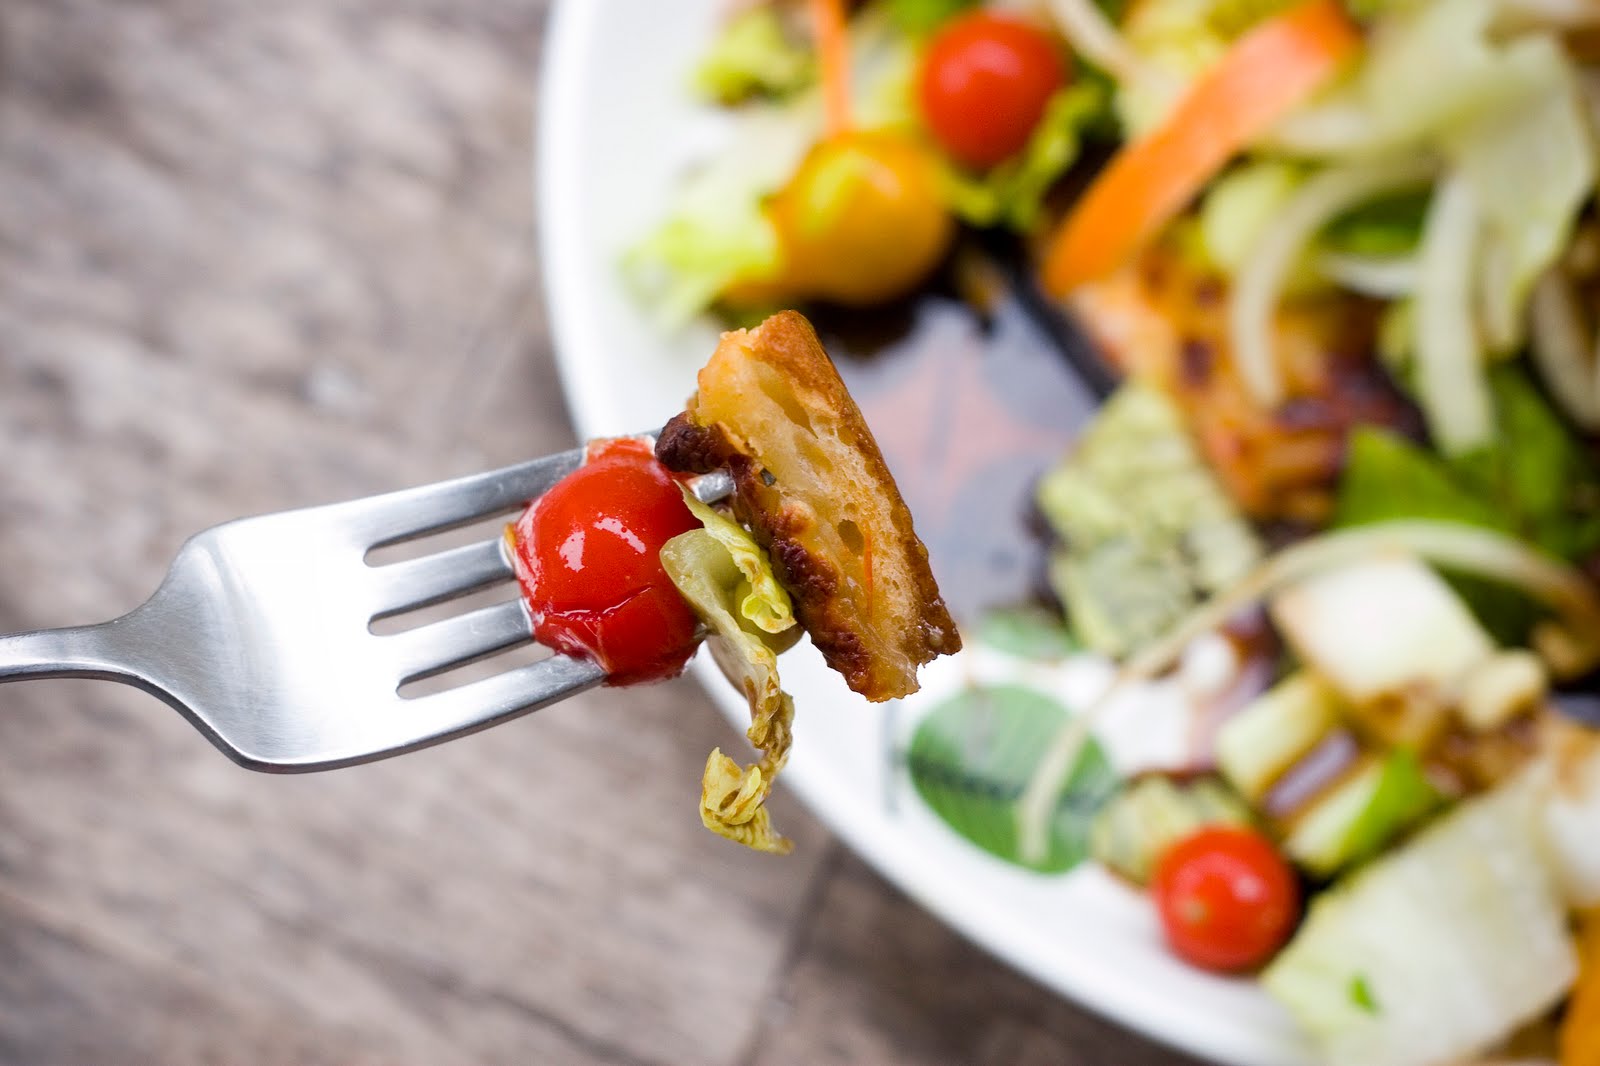
Broil the crap out of the cold slice - chop whatever greens and fresh veggies are lying around - mix 2 tbl balsamic, 1 dash garlic powder, dash salt, little blob of mustard, grind or two of pepper, shake well in a jar, add 2 tbl olive oil, shake again - plate slice, toss two handfuls of salad over slice - dress to taste (for me, it's usually the entire 1/3 cup, as described above).
It's like pizza casserole, but lighter. Lots of texture - hot, chewy, cheesy, crunchy and cool. Mmmm. And if you're a balsamic fan, the crust absorbing all of that tart, sweet goodness might get you planning ahead when you order pizza.
Anyway.
When I'm at home and eating a day-or-two old pizza piece, I have a little ritual I go through, if there's salad makings in the fridge too. Goes like this.
Broil the crap out of the cold slice - chop whatever greens and fresh veggies are lying around - mix 2 tbl balsamic, 1 dash garlic powder, dash salt, little blob of mustard, grind or two of pepper, shake well in a jar, add 2 tbl olive oil, shake again - plate slice, toss two handfuls of salad over slice - dress to taste (for me, it's usually the entire 1/3 cup, as described above).
It's like pizza casserole, but lighter. Lots of texture - hot, chewy, cheesy, crunchy and cool. Mmmm. And if you're a balsamic fan, the crust absorbing all of that tart, sweet goodness might get you planning ahead when you order pizza.
Thursday, July 1, 2010
Doing sacreligious things to pizza again...
So, one of the biggest differences I've noticed since moving south, eating-out wise, lies in the condiment category. Tabasco isn't really around - you're going to be eating Texas Pete's or Frank's (if yer lucky). Mustard is yellow and something you always have to request. Salt and pepper on every table, even in Vietnamese joints. And Ranch. On everything. And I mean everything.
Not that I mind, I love the stuff. You think dipping fries in Mayo us uber-delish? Ranch is so much more fun. Crappy pizza is greatly improved by a dunk in the ranchpool. And fried pickles...well...there's just nothing else that will do.
With that in mind, I made something nasty last night. The opposite of healthy. The eat-a-slice-and-immediately-break-into-sweat pie.
White pizza, southern style.
But really, this pie was an excuse to show my newly-discovered, fav pizza topping off. Cucumbers!
Try it before you scrunch up your face in disgust. What happens when cukes are baked with cheese and sauce is pretty magic - they soften just a bit and soak up flavors like you wouldn't believe. Now I know watery veggies spell disaster for pies - but since I'm a devotee of fresh 'mater pizza, I've developed a relatively foolproof method of de-moisturizing veggies before using them as toppings. The almighty paper towel method.
First, peel and core your cukes with a spoon (seeds hold water!) then slice into 1/4 inch slices. Salt very lightly, and lay on a paper towel for about 20 minutes. Put another towel on top to increase moisture absorption.
This works just as well on tomatoes, for the rekkid.
For the rest of the pie, you'll need:
1 batch of pizza dough (this recipe is my fav)
1 - 1.5 cups Ranch Dressing (I put my recipe at the bottom, but in a pinch a refrigerated brand will do)
1 medium cuke, sliced, cored, and drained
1 medium mater, sliced thin and drained
2 cups mild Jack cheese, shredded
Sliced BBQ or Buffalo "wings" - I used morningstar farms', making sure to douse them in more sauce before baking. Let them cool and slice them very thin.
Flour, for dusting.
Preheat yer oven to 500f.
Prepare your crust. I'm attempting to learn how to properly throw dough: this video is muy helpful. Use your pizza stone or pizza pan to plate the pie, and move on to the next step.
Using a ladle, spoon dressing onto the pie, spreading to the edge, just as you would pizza sauce. You can use a little bit more than you would red sauce, since there's less water in Ranch than tomato sauce.
Lay a thin layer (maybe 1/2 cup) of cheese over the ranch. This is your liquid barrier.
In a single layer, scatter your cukes, then on top of them, tomatoes, then on the tippy top, sliced "wings", keeping things as flat as possible. Sprinkle the rest of the cheese over top. Slide that mother into the oven and bake until the bottom crust is almost burnt - you need a tough crust to stand up to the liquid in this pizza. This usually takes about 15 minutes. I also broil for 2-3 minutes once the crust is almost to where I like it, just to get
brown on top.
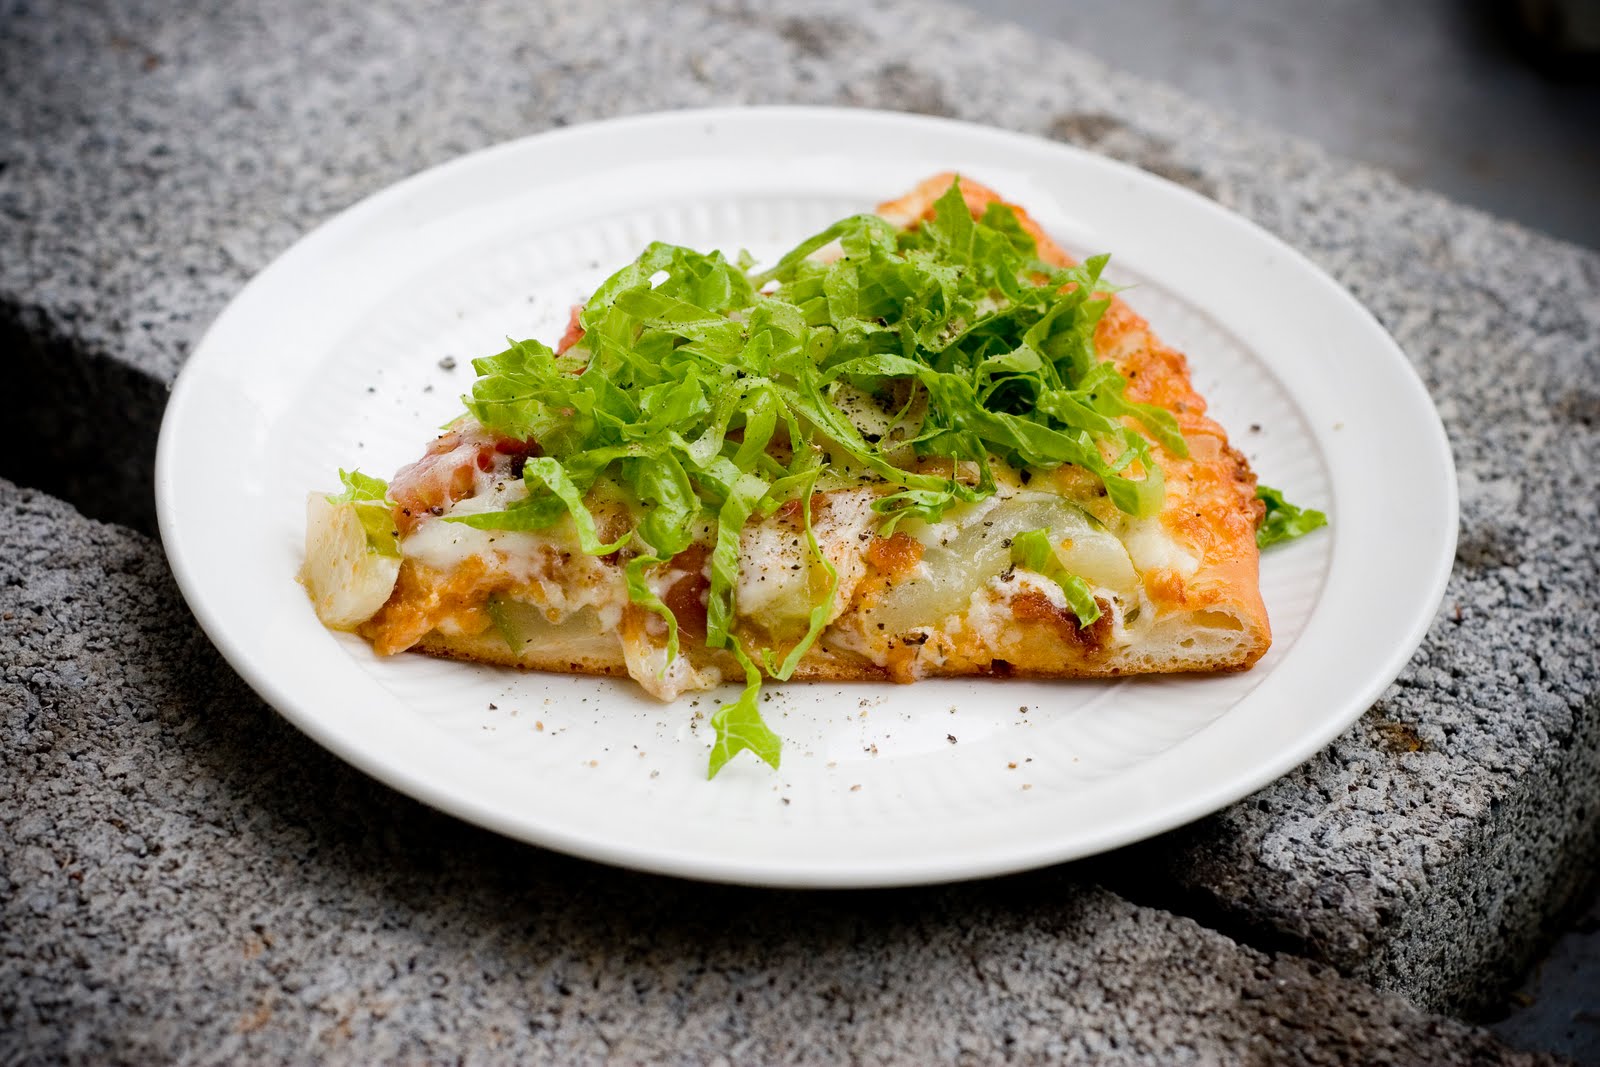
Let this thing sit for about 10 minutes, maybe longer, before even trying to slice it. In fact, I enjoyed the slice I had the next day (after it cooled, and I reheated it) a little more than the slice I had fresh outta the oven. If you're feeling arty and cool, top your slice with a little lettuce chiffonade! So yum.
Your Momma's Ranch Dressin':
Not that I mind, I love the stuff. You think dipping fries in Mayo us uber-delish? Ranch is so much more fun. Crappy pizza is greatly improved by a dunk in the ranchpool. And fried pickles...well...there's just nothing else that will do.
With that in mind, I made something nasty last night. The opposite of healthy. The eat-a-slice-and-immediately-break-into-sweat pie.
White pizza, southern style.
But really, this pie was an excuse to show my newly-discovered, fav pizza topping off. Cucumbers!
Try it before you scrunch up your face in disgust. What happens when cukes are baked with cheese and sauce is pretty magic - they soften just a bit and soak up flavors like you wouldn't believe. Now I know watery veggies spell disaster for pies - but since I'm a devotee of fresh 'mater pizza, I've developed a relatively foolproof method of de-moisturizing veggies before using them as toppings. The almighty paper towel method.
First, peel and core your cukes with a spoon (seeds hold water!) then slice into 1/4 inch slices. Salt very lightly, and lay on a paper towel for about 20 minutes. Put another towel on top to increase moisture absorption.
This works just as well on tomatoes, for the rekkid.
For the rest of the pie, you'll need:
1 batch of pizza dough (this recipe is my fav)
1 - 1.5 cups Ranch Dressing (I put my recipe at the bottom, but in a pinch a refrigerated brand will do)
1 medium cuke, sliced, cored, and drained
1 medium mater, sliced thin and drained
2 cups mild Jack cheese, shredded
Sliced BBQ or Buffalo "wings" - I used morningstar farms', making sure to douse them in more sauce before baking. Let them cool and slice them very thin.
Flour, for dusting.
Preheat yer oven to 500f.
Prepare your crust. I'm attempting to learn how to properly throw dough: this video is muy helpful. Use your pizza stone or pizza pan to plate the pie, and move on to the next step.
Using a ladle, spoon dressing onto the pie, spreading to the edge, just as you would pizza sauce. You can use a little bit more than you would red sauce, since there's less water in Ranch than tomato sauce.
Lay a thin layer (maybe 1/2 cup) of cheese over the ranch. This is your liquid barrier.
In a single layer, scatter your cukes, then on top of them, tomatoes, then on the tippy top, sliced "wings", keeping things as flat as possible. Sprinkle the rest of the cheese over top. Slide that mother into the oven and bake until the bottom crust is almost burnt - you need a tough crust to stand up to the liquid in this pizza. This usually takes about 15 minutes. I also broil for 2-3 minutes once the crust is almost to where I like it, just to get
brown on top.
Let this thing sit for about 10 minutes, maybe longer, before even trying to slice it. In fact, I enjoyed the slice I had the next day (after it cooled, and I reheated it) a little more than the slice I had fresh outta the oven. If you're feeling arty and cool, top your slice with a little lettuce chiffonade! So yum.
Your Momma's Ranch Dressin':
1 quart mayonnaise (either homemade or Duke's, please)
1 pint sour cream (Breakstone's or another, equally firm, sour cream)
2 garlic cloves, minced
1 teaspoon celery salt
1 pint buttermilk
1 pint sour cream (Breakstone's or another, equally firm, sour cream)
2 garlic cloves, minced
1 teaspoon celery salt
1 pint buttermilk
4 tablespoons freshly minced dill, parsley, and chives, equal proportions
1.5 teaspoons freshly ground black pepper
Mix it all very well, and let sit in a jar in the fridge overnight.
Monday, May 31, 2010
Grilled Pizza
God, I can't get enough. I'll even start the Weber up in February and stand around, freezing, to get that burnt, grilled taste onto my pizza. Delicious.
I've been known to go the lazy route, however, when pizza night rolls 'round - TJ's fresh dough is delicious and vegan, and most of the time we just use that. For special occasions, however, I'll make it myself. The differences are subtle - it's lighter, puffier, chewier, takes the heat a bit better. Worth it, if you have the time - you'll find the recipe below.
This is an adaptation of two recipes - the NY Times pizza dough recipe, and Wolfgang Puck's everyday pizza dough. Basically, I added more olive oil, subbed bread flour for half of the all purpose flour (you need all the structural integrity you can get, else all your work and beautiful toppings'll end up as charcoal additives) and did a little more kneading, a tad less rising. In 1.5 hours start to finish, you'll have delectable, chewy dough ready for any topping you desire. Suggestions (for toppings) at the bottom.
The Dough
makes 4 single serve pie crusts or two larger crusts
1 pack active dry yeast (2 tsp)
1 cup warm tap water
1 teaspoon honey or sugar
2 tablespoons extra virgin olive oil
1.5 cups bread flour
1.5 cups all purpose flour
1 tablespoon salt
Mix your yeast, sweetener, and water together in a small bowl. Let sit 5 minutes.
Mix your dry ingredients in the bowl of your stand mixer (the smaller bowl will suffice). Use the paddle or beater attachments (if using the beaters, you'll have to clean them out with a fork before moving onto the dough hooks). Add the olive oil to your yeast water, and while your mixer is mixing, toss your liquids in. Mix your ingredients evenly, then switch to the dough hooks. Knead for about 8 minutes, until everything incorporates and balls up, pulling away from the sides of the bowl. Oil another bowl, plop that dough in there, and cover tightly. Set in a warm place and allow to rise for about 45 minutes.
While you're waiting, make some sauce, saute some mushrooms, grate some cheese, you know.
Take the dough out of the bowl and cut it either into quarters or halves. On a clean, un-floured surface, knead your ball gently for 2-3 minutes, pulling the exterior underneath and working it in, 6-7 times. Your dough will feel firm and elastic when finished. Place on a cookie sheet and repeat with the other pieces - cover with oiled plastic wrap and let rise another half hour.
When the dough has finished resting, generously dust a surface or large cutting board with flour. Grab a hunk of dough, stretch it slightly, then plop it in the flour. Turn over and do the same for the other side. Now pick the dough up and hold it, dangling, while moving constantly in a clockwise motion, letting gravity thin and stretch it out. You may need to stretch the center of your crust a little more forcefully. Rotate and stretch about 5 times, until the dough is thin and you can see light through it when you hold it up to a lamp or the window. If it's a bit thicker at the edges, that's just fine. Lay it out on a cookie sheet or roasting pan. Do the same to your other crusts. Do not stack them on top of each other with layers of cling wrap, foil, or parchment paper in between - they'll stick terribly.
The Process
The best temperature at which to grill pizza crusts is about 5 minutes after you spread your hot coals out from their lighting-position-pyramid. The hotter, the better. You'll need a spatula and tongs, a brush and about 1/2 cup olive oil. Make sure you have the plate or pan space to move the crusts around as needed, since they'll be getting two doses of grill (one to grill one side, one to finish the other and melt your cheese).
Do either two smaller crusts or one large crust at a time, do not overcrowd. Brush the crusts with oil, generously, and with two fingers, grab the top of your crust. Flip it over and gently place it on the grill, quickly. Get it as close to the edge of your grill, and away from the hottest part, as possible. Do the same with the other crust and put the lid on the grill.
Wait a minute or two. At a minute in, you'll see the dough start to bubble.
Turn the crusts 180 degrees, to grill more evenly. Once you have a nice, toasty (even black in places) bottom, brush the top with oil, and flip them. Close the grill again. This time, only cook the crusts for about 30 seconds to a minute - just long enough to set the dough. Pull them off.
Top your pizzas on the finished (most cooked) side with your choice of cheeses and veggies (and in this case, fake 'roni and fakon).
With a large, wide spatula, set your pizzas on the grill once again, as close to the edge as possible. Close the grill and let 'em go until your cheese is somewhat melty. Watch the bottom - burnt is good, charred isn't. If you'd like, you can finish them in the oven with the broiler, but that's cheating!
Let pizza's sit for 3 minutes before slicing and noshing.
Grilling pizzas introduces a very strong burnt flavor to the palate, so you'll want to use strong toppings and cheeses. Honestly, a light, fresh mozz gets a little lost. Use some asiago, blue cheeses, brie, stronger flavors when topping your to-be-grilled-'zzas.
Here, we had some scapes that we brushed with oil and quick grilled. The tops ended up on our "Hawaiian" pie - accompanied by grilled pineapple and fake bacon, along with red sauce, mozzarella, and asiago. The other was simple - red sauce, mozz, fake pepperoni, and quick-sauteed mushrooms. Nom.
I've been known to go the lazy route, however, when pizza night rolls 'round - TJ's fresh dough is delicious and vegan, and most of the time we just use that. For special occasions, however, I'll make it myself. The differences are subtle - it's lighter, puffier, chewier, takes the heat a bit better. Worth it, if you have the time - you'll find the recipe below.
This is an adaptation of two recipes - the NY Times pizza dough recipe, and Wolfgang Puck's everyday pizza dough. Basically, I added more olive oil, subbed bread flour for half of the all purpose flour (you need all the structural integrity you can get, else all your work and beautiful toppings'll end up as charcoal additives) and did a little more kneading, a tad less rising. In 1.5 hours start to finish, you'll have delectable, chewy dough ready for any topping you desire. Suggestions (for toppings) at the bottom.
The Dough
makes 4 single serve pie crusts or two larger crusts
1 pack active dry yeast (2 tsp)
1 cup warm tap water
1 teaspoon honey or sugar
2 tablespoons extra virgin olive oil
1.5 cups bread flour
1.5 cups all purpose flour
1 tablespoon salt
Mix your yeast, sweetener, and water together in a small bowl. Let sit 5 minutes.
Mix your dry ingredients in the bowl of your stand mixer (the smaller bowl will suffice). Use the paddle or beater attachments (if using the beaters, you'll have to clean them out with a fork before moving onto the dough hooks). Add the olive oil to your yeast water, and while your mixer is mixing, toss your liquids in. Mix your ingredients evenly, then switch to the dough hooks. Knead for about 8 minutes, until everything incorporates and balls up, pulling away from the sides of the bowl. Oil another bowl, plop that dough in there, and cover tightly. Set in a warm place and allow to rise for about 45 minutes.
While you're waiting, make some sauce, saute some mushrooms, grate some cheese, you know.
Take the dough out of the bowl and cut it either into quarters or halves. On a clean, un-floured surface, knead your ball gently for 2-3 minutes, pulling the exterior underneath and working it in, 6-7 times. Your dough will feel firm and elastic when finished. Place on a cookie sheet and repeat with the other pieces - cover with oiled plastic wrap and let rise another half hour.
When the dough has finished resting, generously dust a surface or large cutting board with flour. Grab a hunk of dough, stretch it slightly, then plop it in the flour. Turn over and do the same for the other side. Now pick the dough up and hold it, dangling, while moving constantly in a clockwise motion, letting gravity thin and stretch it out. You may need to stretch the center of your crust a little more forcefully. Rotate and stretch about 5 times, until the dough is thin and you can see light through it when you hold it up to a lamp or the window. If it's a bit thicker at the edges, that's just fine. Lay it out on a cookie sheet or roasting pan. Do the same to your other crusts. Do not stack them on top of each other with layers of cling wrap, foil, or parchment paper in between - they'll stick terribly.
The Process
The best temperature at which to grill pizza crusts is about 5 minutes after you spread your hot coals out from their lighting-position-pyramid. The hotter, the better. You'll need a spatula and tongs, a brush and about 1/2 cup olive oil. Make sure you have the plate or pan space to move the crusts around as needed, since they'll be getting two doses of grill (one to grill one side, one to finish the other and melt your cheese).
Do either two smaller crusts or one large crust at a time, do not overcrowd. Brush the crusts with oil, generously, and with two fingers, grab the top of your crust. Flip it over and gently place it on the grill, quickly. Get it as close to the edge of your grill, and away from the hottest part, as possible. Do the same with the other crust and put the lid on the grill.
Wait a minute or two. At a minute in, you'll see the dough start to bubble.
Turn the crusts 180 degrees, to grill more evenly. Once you have a nice, toasty (even black in places) bottom, brush the top with oil, and flip them. Close the grill again. This time, only cook the crusts for about 30 seconds to a minute - just long enough to set the dough. Pull them off.
Top your pizzas on the finished (most cooked) side with your choice of cheeses and veggies (and in this case, fake 'roni and fakon).
With a large, wide spatula, set your pizzas on the grill once again, as close to the edge as possible. Close the grill and let 'em go until your cheese is somewhat melty. Watch the bottom - burnt is good, charred isn't. If you'd like, you can finish them in the oven with the broiler, but that's cheating!
Let pizza's sit for 3 minutes before slicing and noshing.
Grilling pizzas introduces a very strong burnt flavor to the palate, so you'll want to use strong toppings and cheeses. Honestly, a light, fresh mozz gets a little lost. Use some asiago, blue cheeses, brie, stronger flavors when topping your to-be-grilled-'zzas.
Here, we had some scapes that we brushed with oil and quick grilled. The tops ended up on our "Hawaiian" pie - accompanied by grilled pineapple and fake bacon, along with red sauce, mozzarella, and asiago. The other was simple - red sauce, mozz, fake pepperoni, and quick-sauteed mushrooms. Nom.
Friday, April 23, 2010
Fill Me Up
Here we are! Welcome to NoFacePlate. Yes, I'm jumping on the food blog boat a bit downstream. But as wise man say, better late than never.
What you'll find here is Charlotte, NC-centric veg/local/organic news along with recipes, pictures, and even some step-by-steps. Occasional rambling is guaranteed. So let's cut to the chase! On with the Grub!
Torta Pizza

This bad boy is a killer weekend brekkie and can comfortably serve up to 6. Based on my neverending obsession with Tortas (aka, the Perfect Sandwich), we've eaten far too many of these over the past few weeks. Perfect hangover medication.
You'll need:
1 package pizza dough (a la Trader Joe's refriged dough)
1 can black beans, drained, mashed, mixed with a dash of garlic powder and small pour of hickory flavoring
3 plum tomatoes, sliced, salted
1/2 package TJ's Soy Chorizo, or other soy crumbles (about a cup)
4-6 eggs (based on how many servings you'll need - 1 egg per is plenty)
Shredded cheese or chreeze, about a cup
3-6 pickled jalapenos, sliced (I use homemade, but La Morena 'penos will do in a pinch)
To finish:
1 avocado, sliced
Sprinkling of kosher salt
Shredded lettuce
Thinly sliced onion
Hot sauce, to serve
Do eeet:
Preheat your oven to 425. Roll or stretch your dough to fit your pizza pan, don't forget to dust the pan with some flour.
Spread your beans over the dough, leaving the obligatory crust space at edge. Thin layering is good. Now, crumble your soy chorizo, evenly covering your beans. Spread your cheese over the chorizo, again, thinly. Arrange tomatoes and sliced jalapenos in a pleasing pattern to finish.
Stick the pie in the oven for 4-5 minutes, until the cheese starts to melt. Take it out and use the back of a large spoon to form dimples in the pizza where you want your eggs to go. Crack the eggs directly onto the pie, spacing them evenly, minding how you plan to slice the pie when it's finished (you're aiming for one egg per slice, without cutting into the yolk). Put the pie back in the oven and bake until the eggs are semi-set, about 10 minutes. If you prefer a firm yolk, leave it in for 12-13.
Take the pie out of the oven and let it cool for 8-10 minutes. Slice it up, carefully avoiding yolk-breakage.
As you plate each slice, top with sliced avocado (sprinkled with sea salt), shredded lettuce, and thin slices of onion. Messy, but delicious.

You're probably going to have some wimps wanting to eat this with fork and knife, so have some available! And don't forget the hot sauce au jus. Enjoy!
What you'll find here is Charlotte, NC-centric veg/local/organic news along with recipes, pictures, and even some step-by-steps. Occasional rambling is guaranteed. So let's cut to the chase! On with the Grub!
Torta Pizza
This bad boy is a killer weekend brekkie and can comfortably serve up to 6. Based on my neverending obsession with Tortas (aka, the Perfect Sandwich), we've eaten far too many of these over the past few weeks. Perfect hangover medication.
You'll need:
1 package pizza dough (a la Trader Joe's refriged dough)
1 can black beans, drained, mashed, mixed with a dash of garlic powder and small pour of hickory flavoring
3 plum tomatoes, sliced, salted
1/2 package TJ's Soy Chorizo, or other soy crumbles (about a cup)
4-6 eggs (based on how many servings you'll need - 1 egg per is plenty)
Shredded cheese or chreeze, about a cup
3-6 pickled jalapenos, sliced (I use homemade, but La Morena 'penos will do in a pinch)
To finish:
1 avocado, sliced
Sprinkling of kosher salt
Shredded lettuce
Thinly sliced onion
Hot sauce, to serve
Do eeet:
Preheat your oven to 425. Roll or stretch your dough to fit your pizza pan, don't forget to dust the pan with some flour.
Spread your beans over the dough, leaving the obligatory crust space at edge. Thin layering is good. Now, crumble your soy chorizo, evenly covering your beans. Spread your cheese over the chorizo, again, thinly. Arrange tomatoes and sliced jalapenos in a pleasing pattern to finish.
Stick the pie in the oven for 4-5 minutes, until the cheese starts to melt. Take it out and use the back of a large spoon to form dimples in the pizza where you want your eggs to go. Crack the eggs directly onto the pie, spacing them evenly, minding how you plan to slice the pie when it's finished (you're aiming for one egg per slice, without cutting into the yolk). Put the pie back in the oven and bake until the eggs are semi-set, about 10 minutes. If you prefer a firm yolk, leave it in for 12-13.
Take the pie out of the oven and let it cool for 8-10 minutes. Slice it up, carefully avoiding yolk-breakage.
As you plate each slice, top with sliced avocado (sprinkled with sea salt), shredded lettuce, and thin slices of onion. Messy, but delicious.
You're probably going to have some wimps wanting to eat this with fork and knife, so have some available! And don't forget the hot sauce au jus. Enjoy!
Subscribe to:
Posts (Atom)